
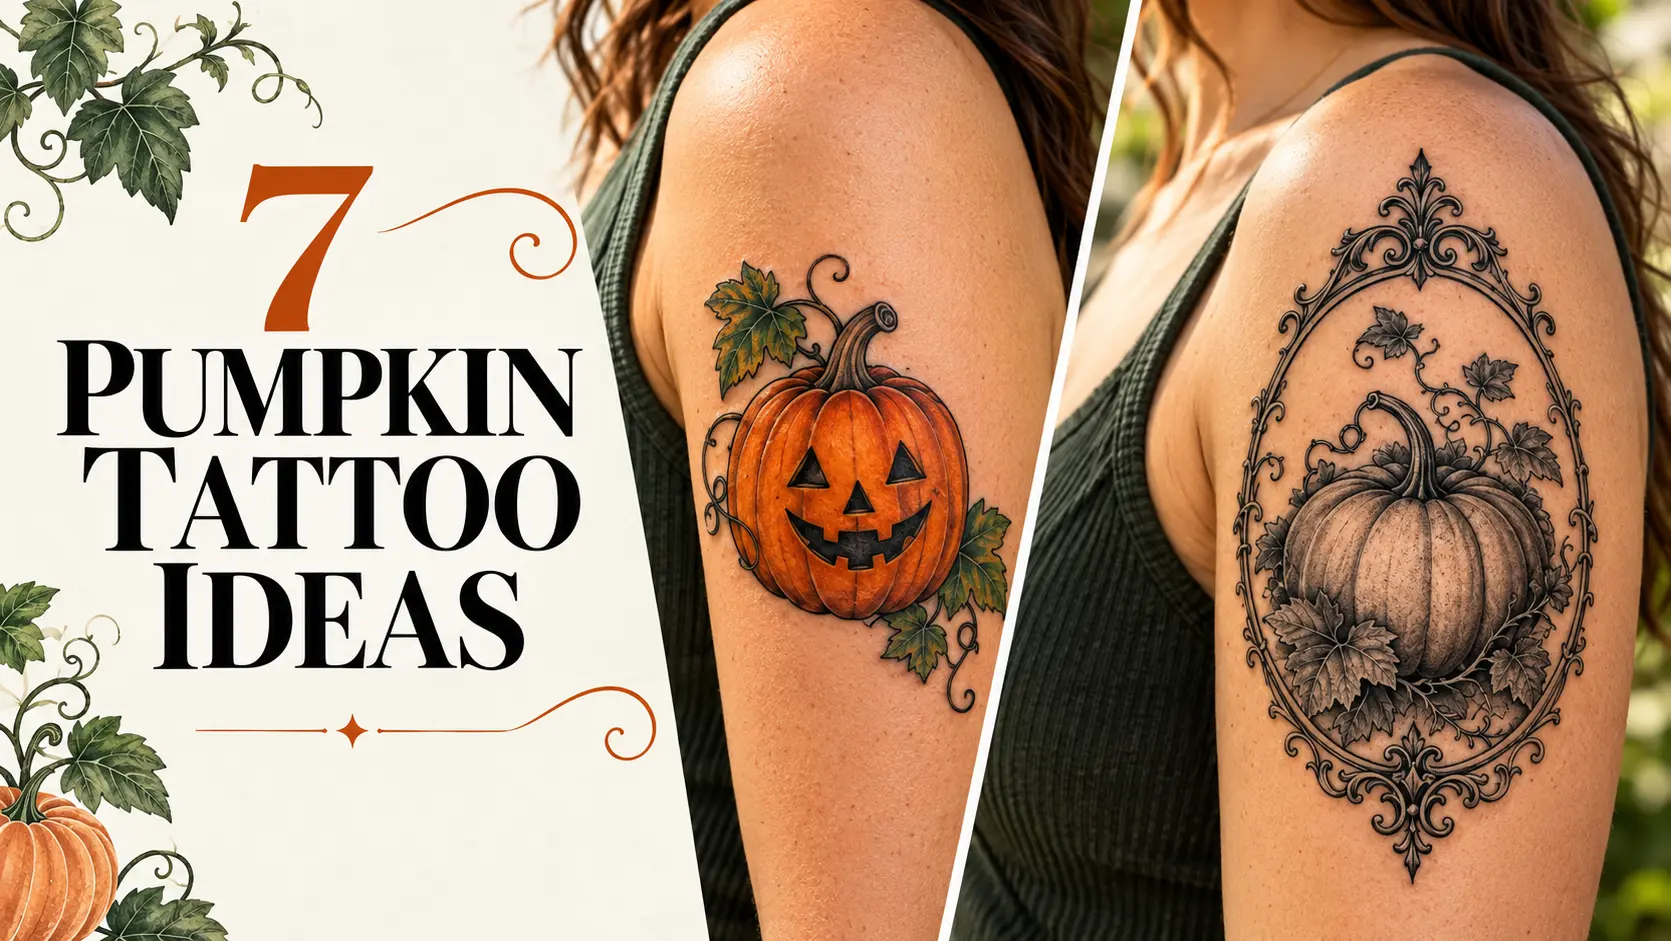
A pumpkin tattoo can look cheerful, botanical, or quietly gothic depending on the details around it. A smiling face makes the Halloween theme immediate. Flowers and a winding vine bring the focus toward autumn, while a dark ornamental frame gives the same subject a more formal character.
These seven pumpkin tattoo ideas show how much the design can change without losing its recognizable shape. Compare the outlines, shading, color accents, and placement mockups to find your preferred direction. The goal is to choose a clear starting point that your artist can develop for you.
1 Minimal Pumpkin
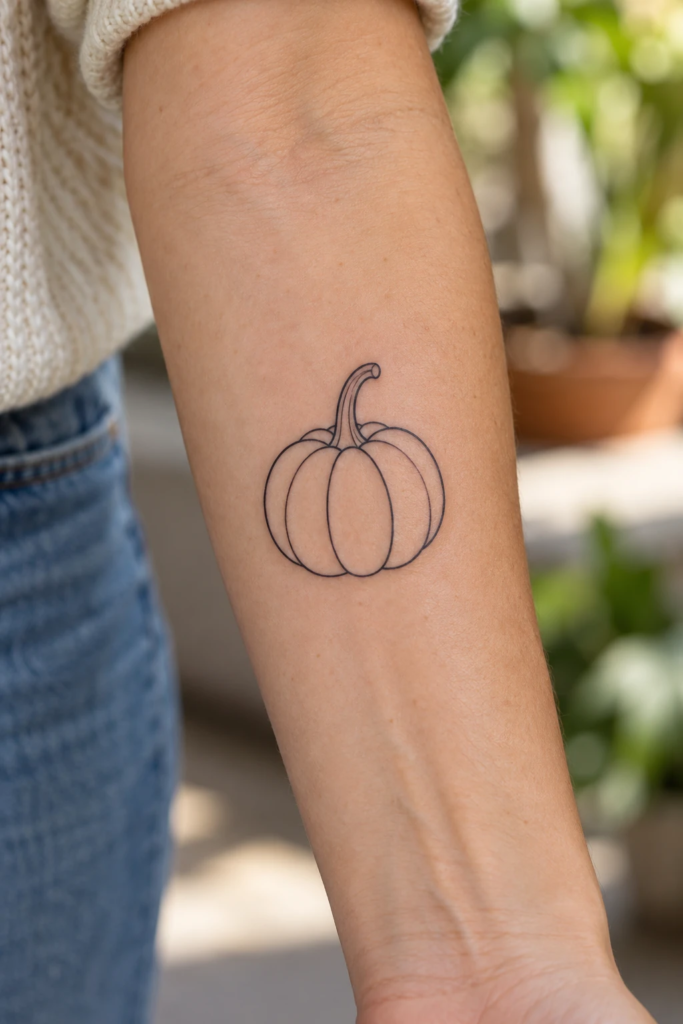
A minimal pumpkin keeps only the shape, stem, and a few segment lines. Leaving out the face makes it feel more like an autumn motif than a Halloween character. The curved stem adds a little personality, while the open interior keeps the image visually light.
This design gives you room to decide how subtle you want the finished piece to be. Compare a standalone outline with a version that has one small leaf. Ask your artist to choose spacing that keeps the segments distinct at the intended size. Adding lots of fine interior lines would change the simple quality that makes this option appealing.
Design note: Start with a strong outer contour and keep the interior lines selective.
2 Smiling Jack o Lantern
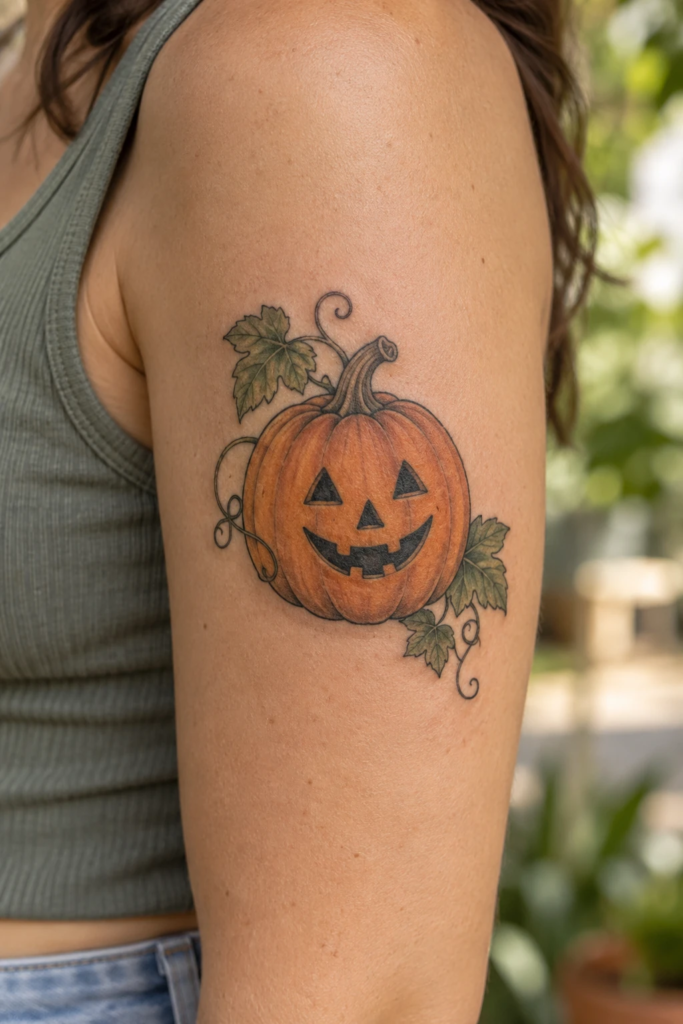
A cheerful jack-o-lantern makes the Halloween mood explicit. The dark triangular eyes and curved smile stand out against the warm orange body, so the expression is easy to read. A small number of leaves provides a softer edge around the round shape.
Choose the expression before adding decoration. A broad grin, a small smile, and uneven eyes each give the pumpkin a different personality. Keep clear space between the eyes and mouth, and let your artist adjust the segment lines around the face. If you prefer black ink, shading can replace the orange while the expression remains the defining feature.
Design note: Make the expression the focal point and keep the face spacious.
3 Pumpkin and Crescent Moon
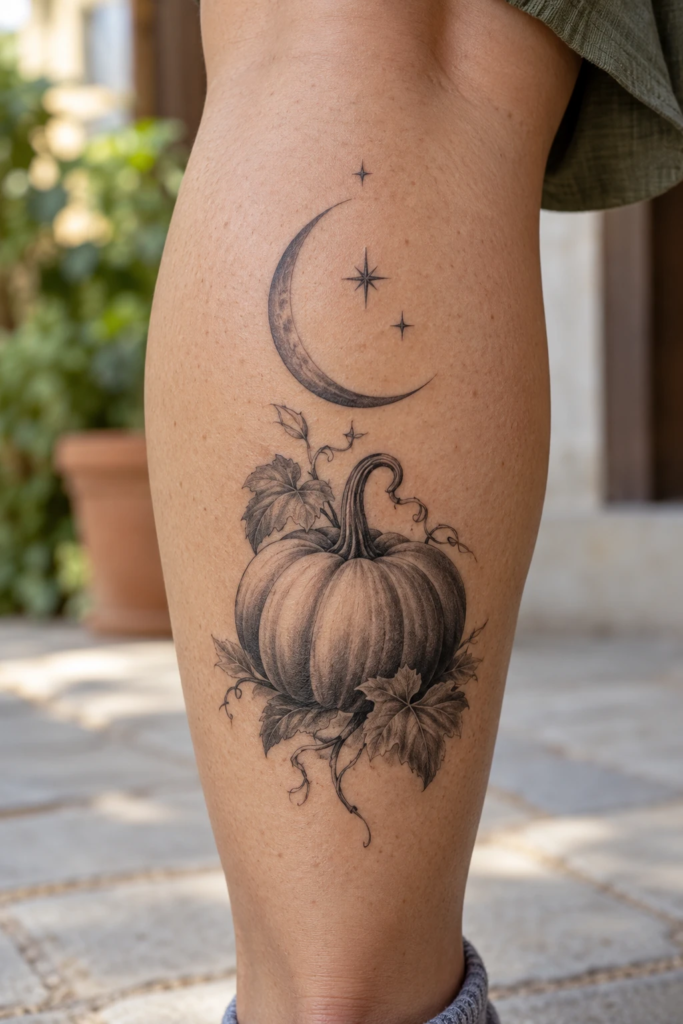
A crescent moon moves the pumpkin into a small night scene. The pumpkin anchors the lower part, and the moon draws the eye upward, creating a taller composition than a pumpkin alone. Sparse stars connect the two subjects without needing a dark sky behind them.
The gap between the stem and moon matters: too little space can make the shapes feel tangled, while too much can make them look unrelated. Adjust that distance on the stencil rather than treating it as fixed. The vertical arrangement can suit a calf or forearm, and your artist can simplify the stars if you want a more restrained result.
Design note: Use the moon to extend the shape while keeping the pumpkin clearly separate.
4 Floral Pumpkin
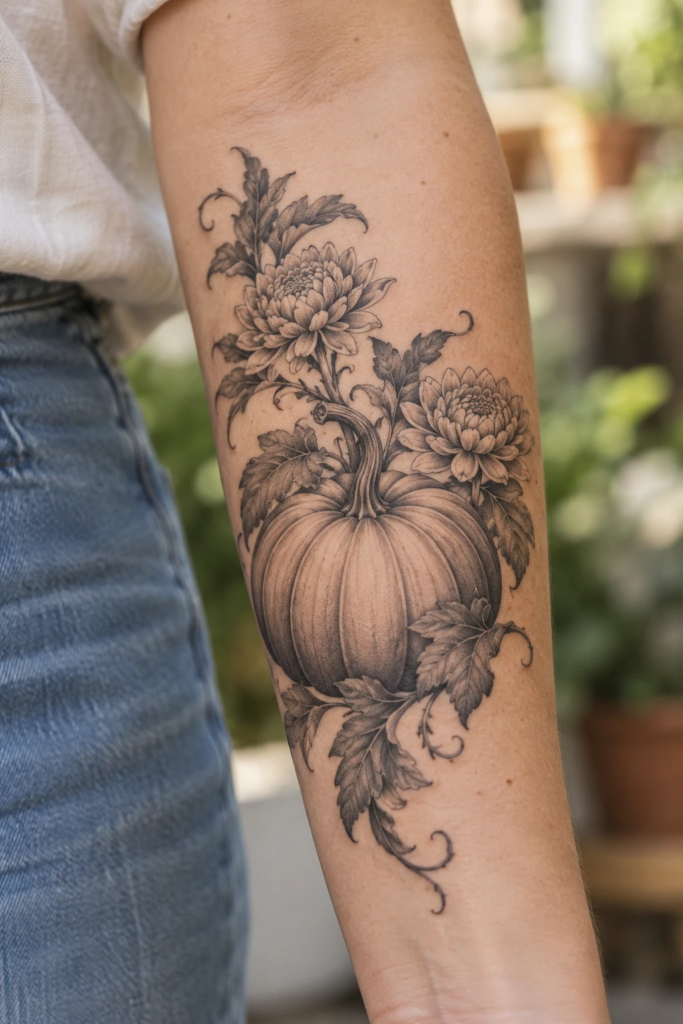
Flowers transform a pumpkin into a botanical arrangement. The round blooms echo its curved segments, while leaves break up the outer edge. Without a carved face, the design can emphasize a love of autumn and flowers rather than a specific Halloween character.
Let the pumpkin remain recognizable beneath the floral crown. Two clear blooms can create enough variety without covering the stem and upper contour completely. Decide whether you prefer fine botanical lines or deeper shading, then apply that choice consistently. For a narrower placement, arrange one flower slightly above the other instead of expanding both out to the sides.
Design note: Keep a clear pumpkin outline below a modest floral crown.
5 Pumpkin in an Ornamental Frame
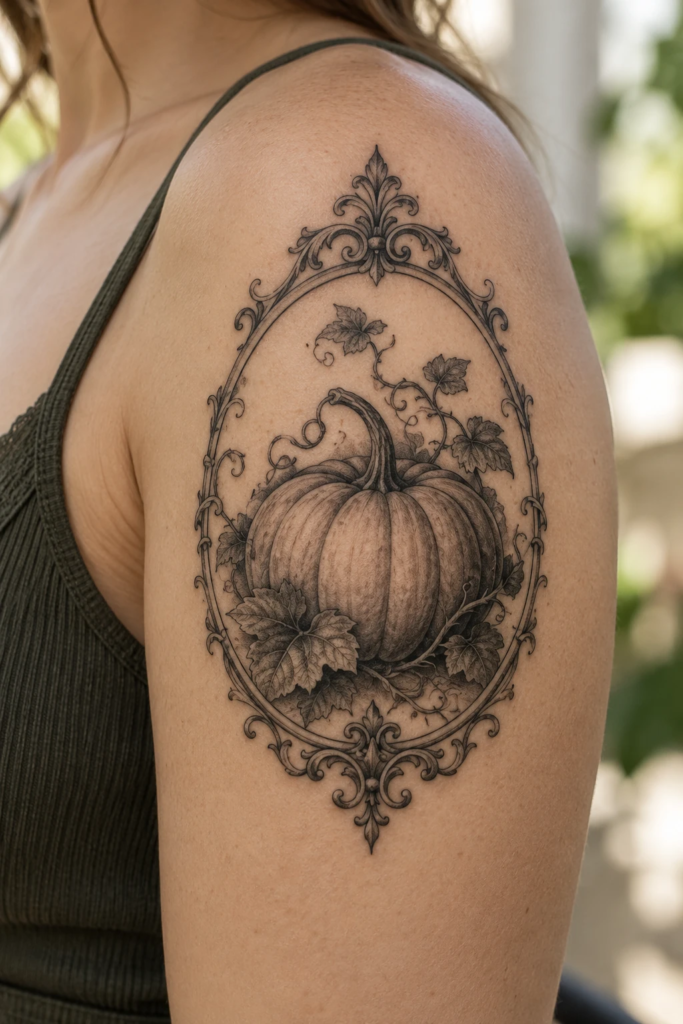
An ornamental frame gives the pumpkin the feeling of a miniature portrait. The oval outline and scrolling details create a gothic mood without relying on a frightening face. Black and grey shading ties the central subject to the frame, making the composition feel more formal than the playful jack-o-lantern.
This is the most decorative direction in the collection, so size and spacing need particular attention. Keep some open space between the pumpkin and the frame. If you want a smaller interpretation, simplify the scrolls rather than compressing every curl. The shoulder mockup shows room for the full oval; a slimmer frame would change the balance for a forearm.
Design note: Let the frame support the pumpkin and preserve an open margin inside it.
6 Pumpkin and Black Cat
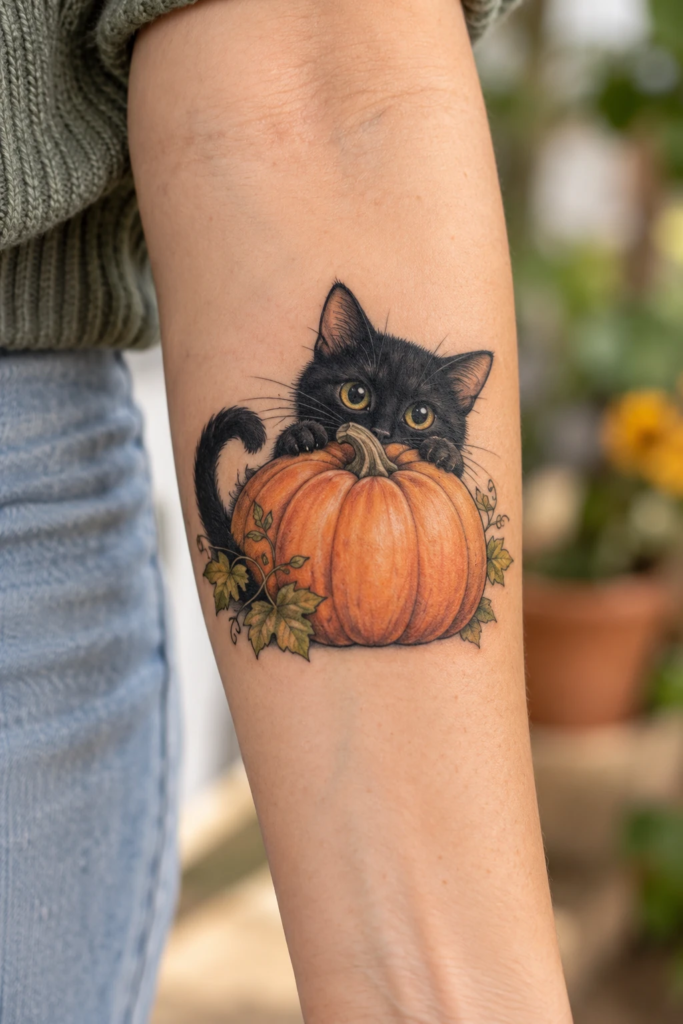
A black cat introduces a second character while keeping the pumpkin central. The dark ears and eyes appear above the orange shape, and the tail curves around the side to connect the two. The contrast between the cat and pumpkin gives this concept a clear, playful silhouette.
Watch where the cat’s head meets the stem. Both details should remain distinct rather than occupying the same small area. You can make the scene sweeter with a rounded face or more mysterious with a narrower expression. Keep the background simple so the relationship between the two subjects remains the reason to look at the design.
Design note: Separate the ears, stem, and tail so both subjects are easy to recognize.
7 Pumpkin Vine
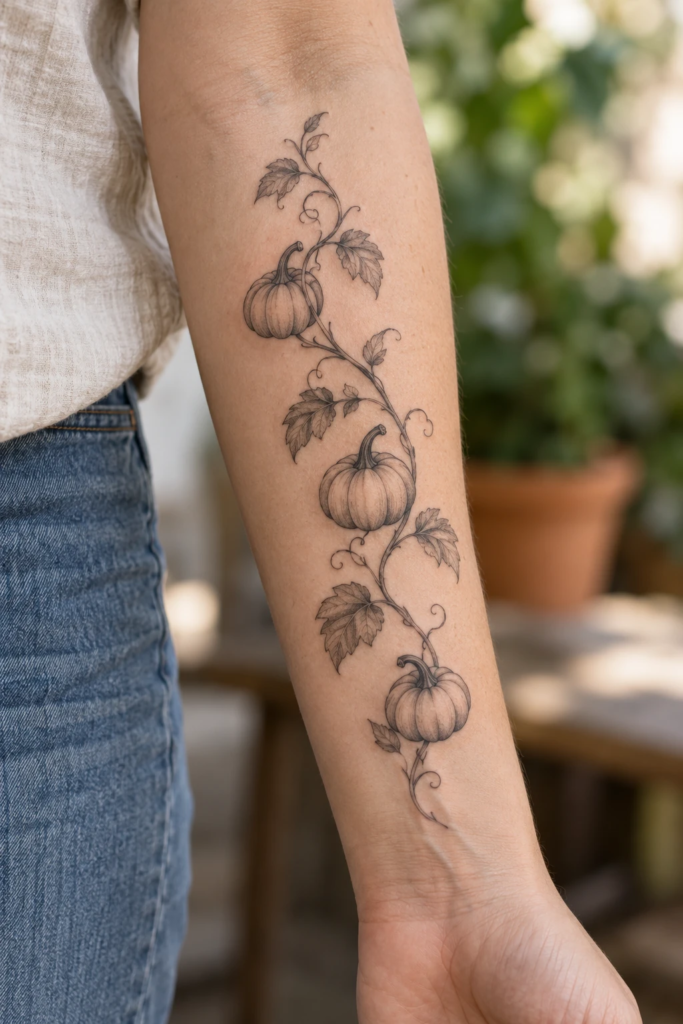
A winding vine turns the pumpkin motif into an elongated botanical tattoo. Repeating the fruit at different heights creates movement along the arm, and the leaves make the connections feel natural. The absence of carved faces keeps the mood closer to an illustrated autumn garden.
Vary the pumpkin sizes slightly so the arrangement does not look like identical stamps. Leave some sections of vine open between the fruit and leaves; those pauses help the eye follow the whole design. Ask your artist to draw the path for your arm and check how the lower pumpkin sits near the wrist before deciding on the final length.
Design note: Build the layout around one readable vine with space between the pumpkins.Request editsCtrl Shift X
Choosing Your Pumpkin Tattoo Style
Start with the question of mood. A carved face and orange accent suggest playful Halloween imagery; a natural pumpkin with flowers or a vine gives a more botanical impression. An ornamental frame changes the whole composition, so choose it because you enjoy that decorative structure rather than simply to fill empty space.
Once you have a favorite direction, compare its width and length on your intended placement. Keep the stem, outer contour, and any facial details clear. Your artist can redraw the supporting elements and adjust the scale so the final piece works as a complete composition on your skin.